Make Mickey Tie-Dye Assorted shirts: a step by step guide
Are you one of those Families? You know, these families who are looking forward to carrying matches matching all Disney holidays? Well, you are in good company because my family is too. Not only are matching shirts ideal for family photos, but they also facilitate stray (and adults) kids in a crowd. Double scoring.
In many Walt Disney World hotels, you will find Mickey Tie-Dye shirt projects on the leisure calendar. There is generally a small sum to make them, but Tie-Dye Mickey assorted shirts have an excellent memory of your family vacation.
How to make Mickey Tie-Dye Assorted shirts
That said, you don’t have to stay at WDW (or take time for holiday crafts) to make your own shirts. This is because the Disney Parks blog shared the instructions to make Mickey Tie-Dye shirts at home.
I tested it to see if it is really as simple as it seems. My family had a lot of “Pinterest failures”, so we went there with great hopes, but also realistic expectations that this may not look like the example. Here is how we made our Mickey shirts in Tie-Dye assorted (and how they turned out).
Plan your trip: What is the best time to go to Disney World or Disneyland?
Step 1: Gather supplies
For this project, you will need white t-shirts, a bucket of icy water, a tablecloth (or something similar to protect your work surface), a plastic film, chalk, large ziploc bags and a tie-dye kit. Your Tie-Dye kit should be delivered with a dye, gloves and elastics, but if it’s just a dye, you will have to get the gloves and elastic bands separately. A grid and a large saucepan, although optional, will also be useful for containing your waste.
Disney guide: All that is to know about Disney Genie and Genie +
You will also need to print the Mickey outline available here. Print it and check the dimensioning before starting. If it is too small, it will be difficult to see the shape of Mickey in your finished project. This should look like the example indicated above.
Step 2: Prepare your shirts
After a little trial and error (the error being that our first cycle of shirts did not go out and that we had to start again), we learned that it is super important to take your time to prepare your shirts in order to clearly highlight the shape of Mickey (the measurement twice, cuts once). If you work with children under the age of 10, you may want to prepare their shirt for them and let them do the fun game: the dye. As it is a kind of disorderly project, it is good to make a full batch of shirts at the same time, so you have only one cleaning.
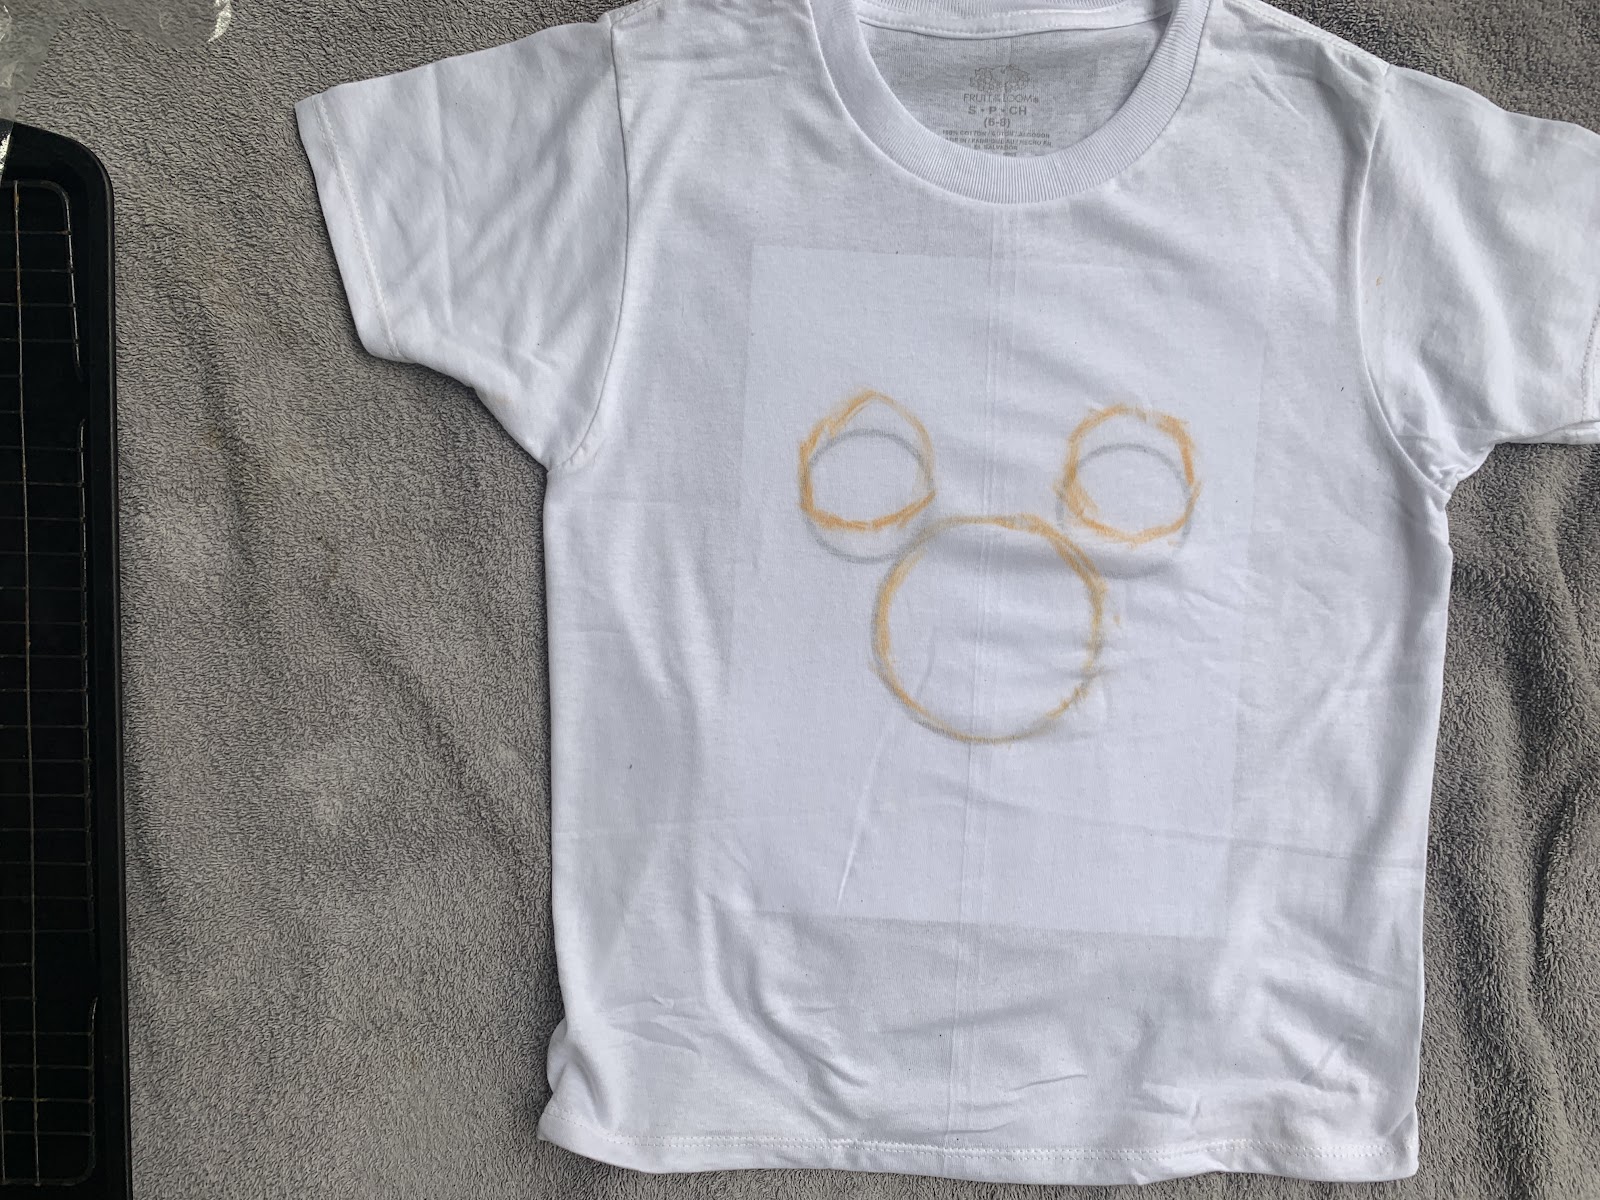
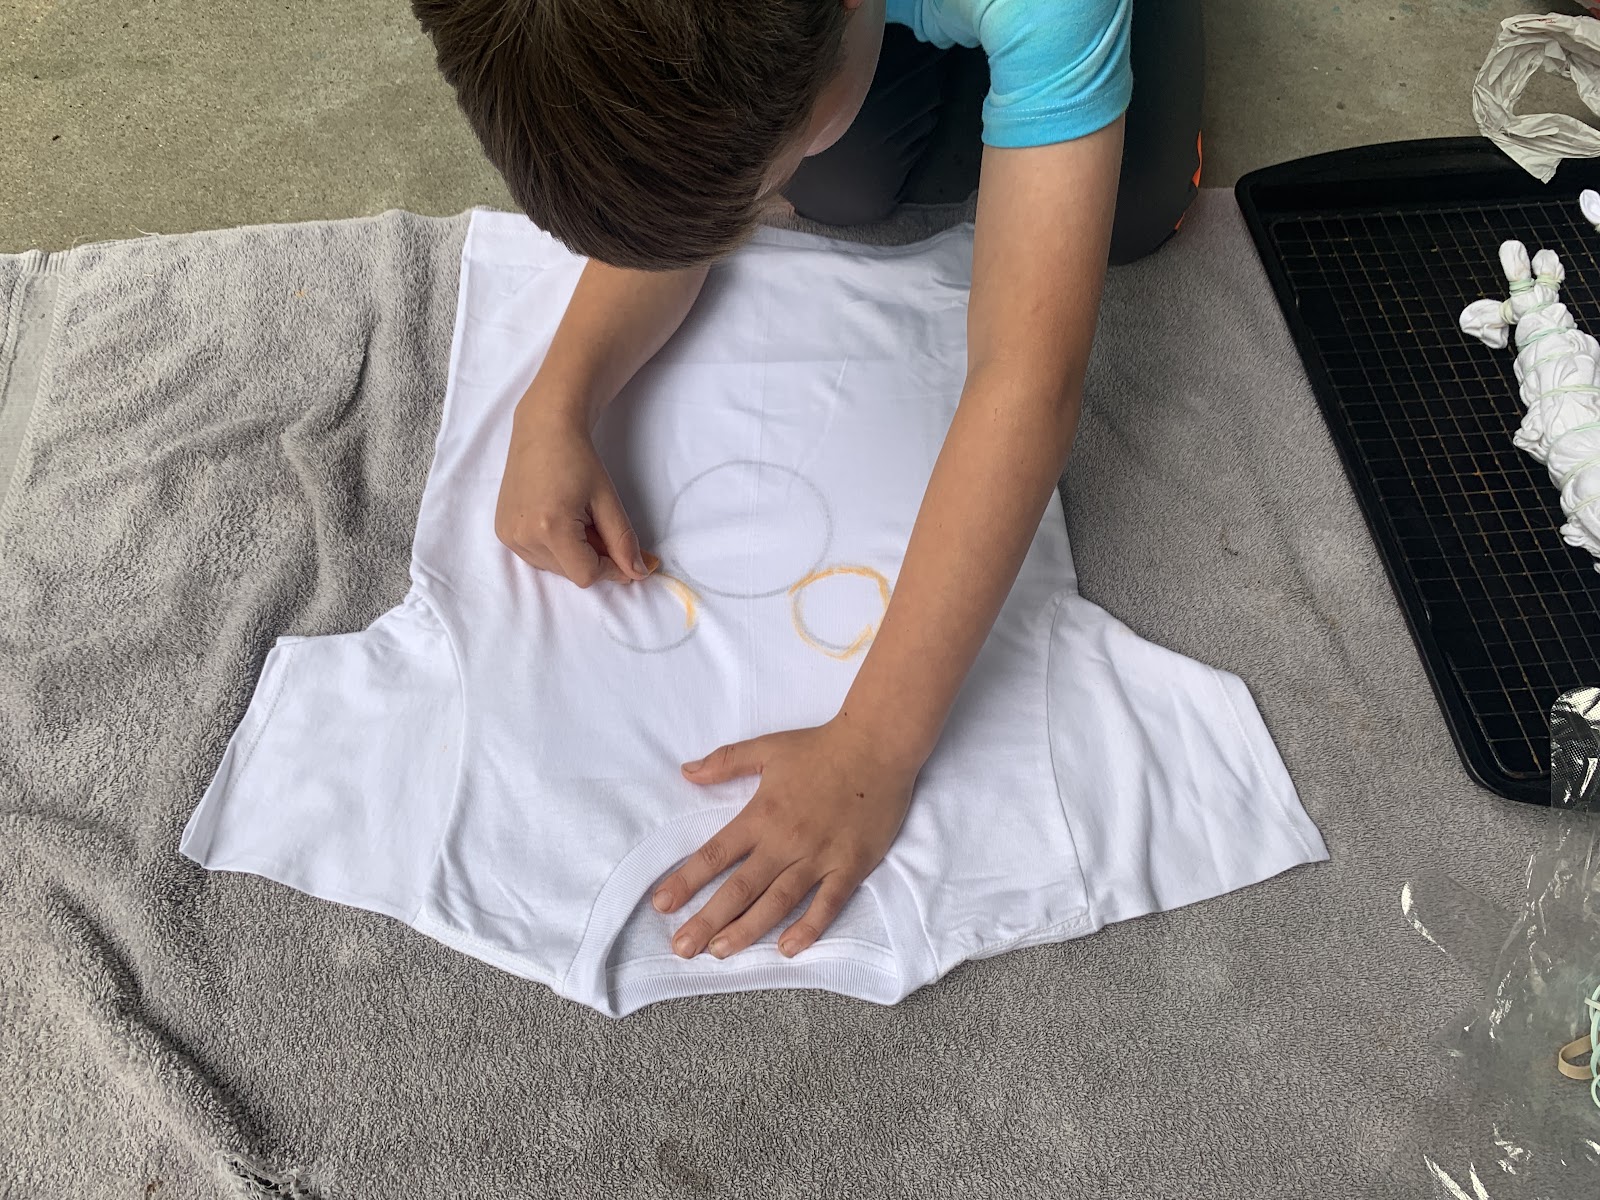
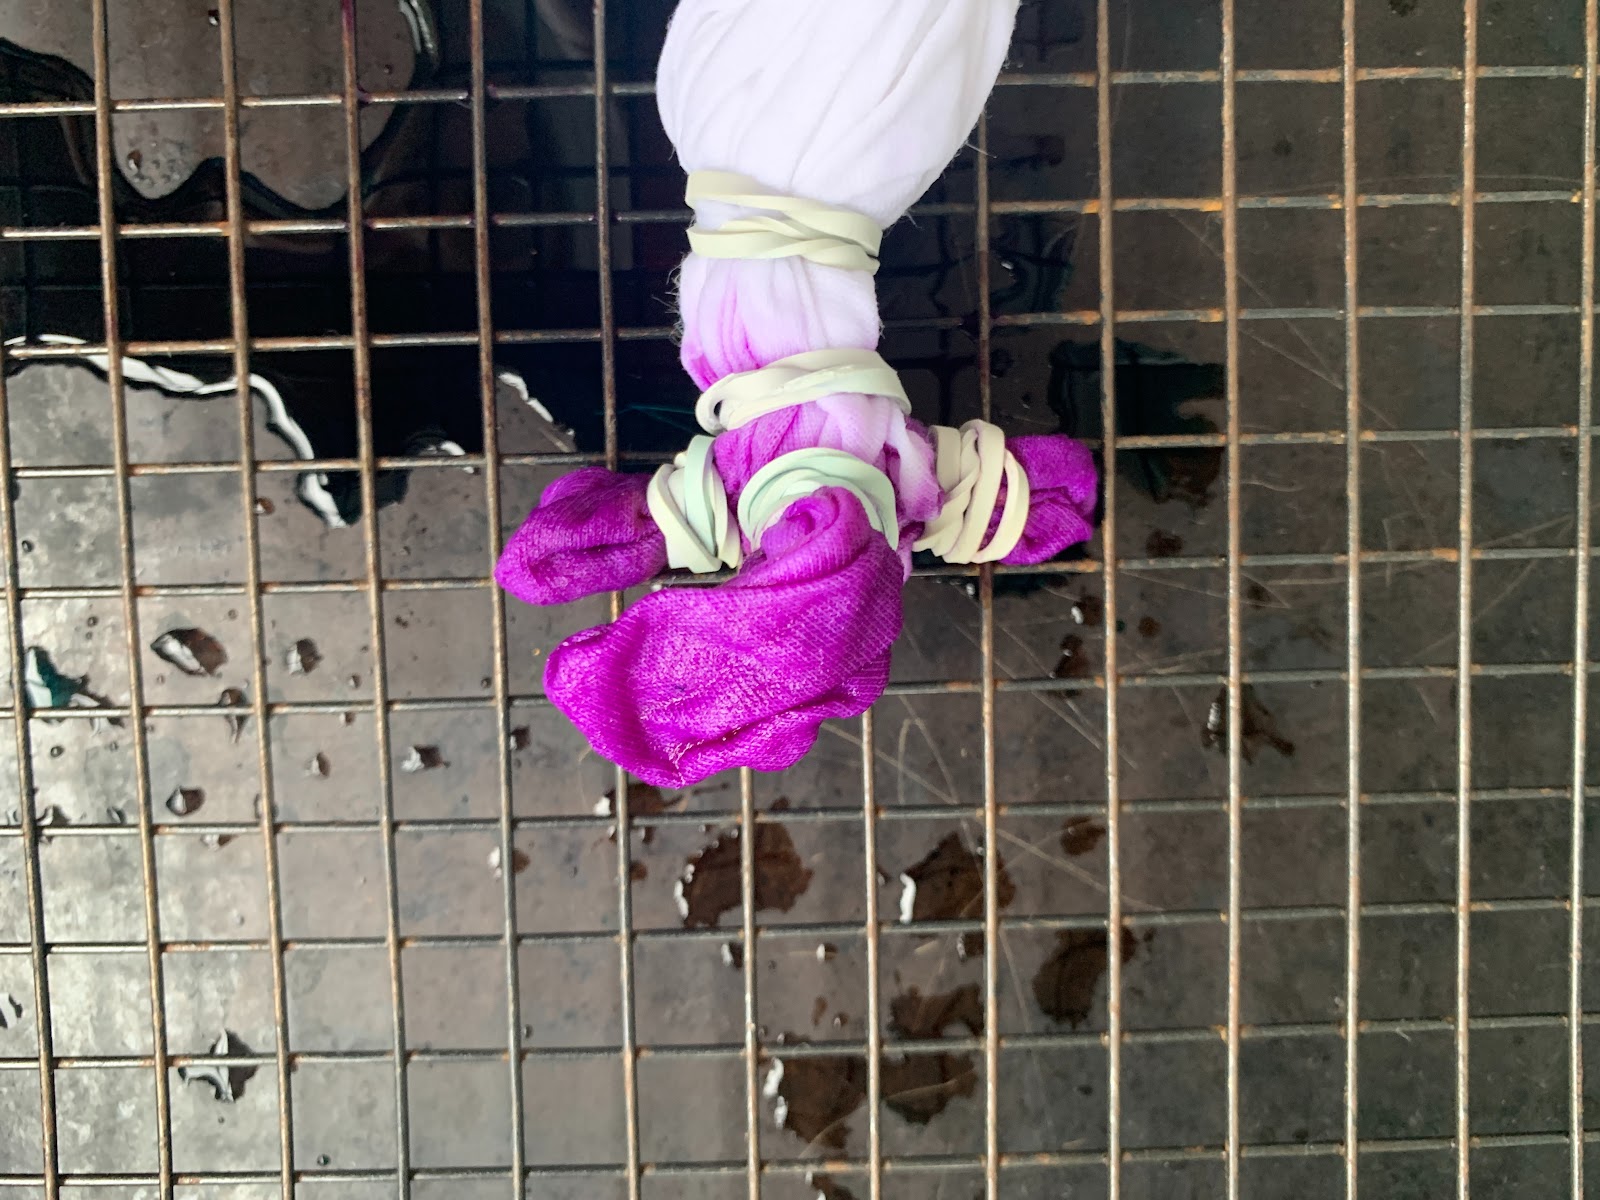
First, use a piece of chalk to trace Mickey’s shape on your shirts. Instead of drawing Mickey’s ears and heads as they look in printing, we drew our ears, then moved the impression a little before retracing the head. It gave us a little more space to work to define the form of Mickey.
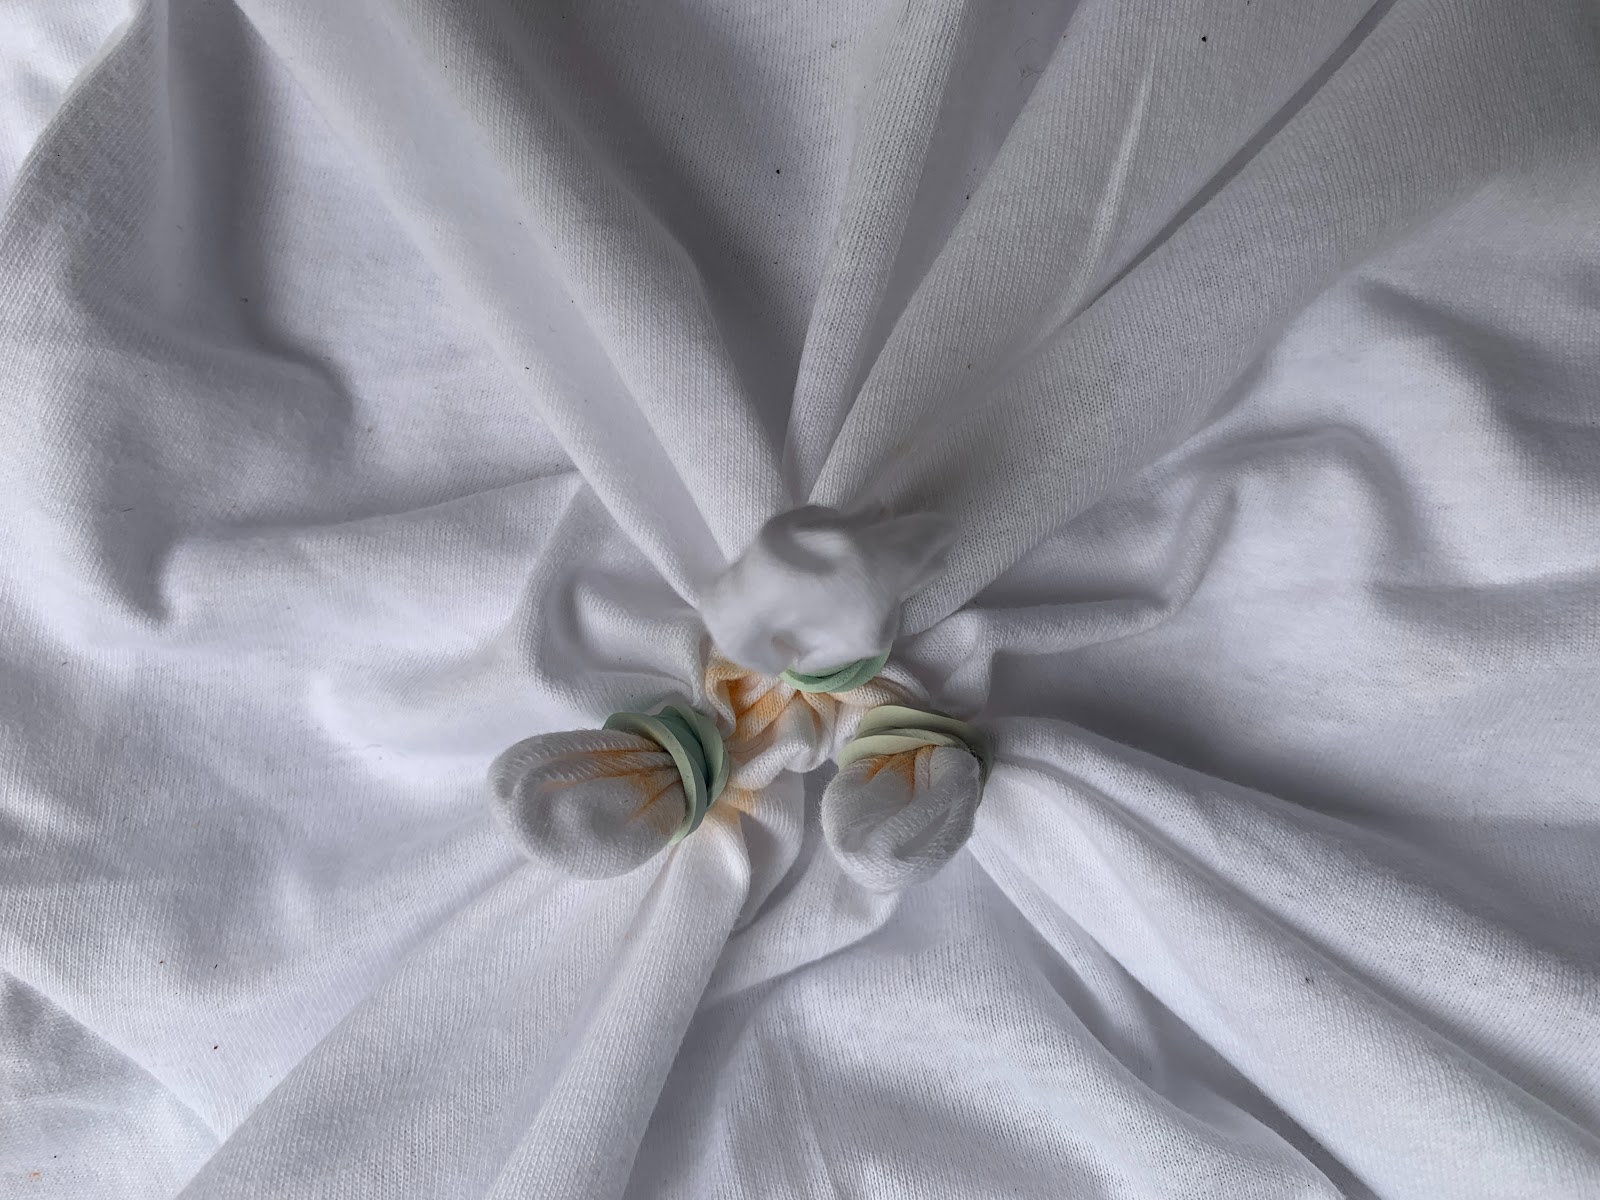
Then you should pinch the center with a ear, pull the upper layer of the shirt up and wrap the rubber strip around the chalk line. Repeat this process with the other ear and face to make your Mickey shape.
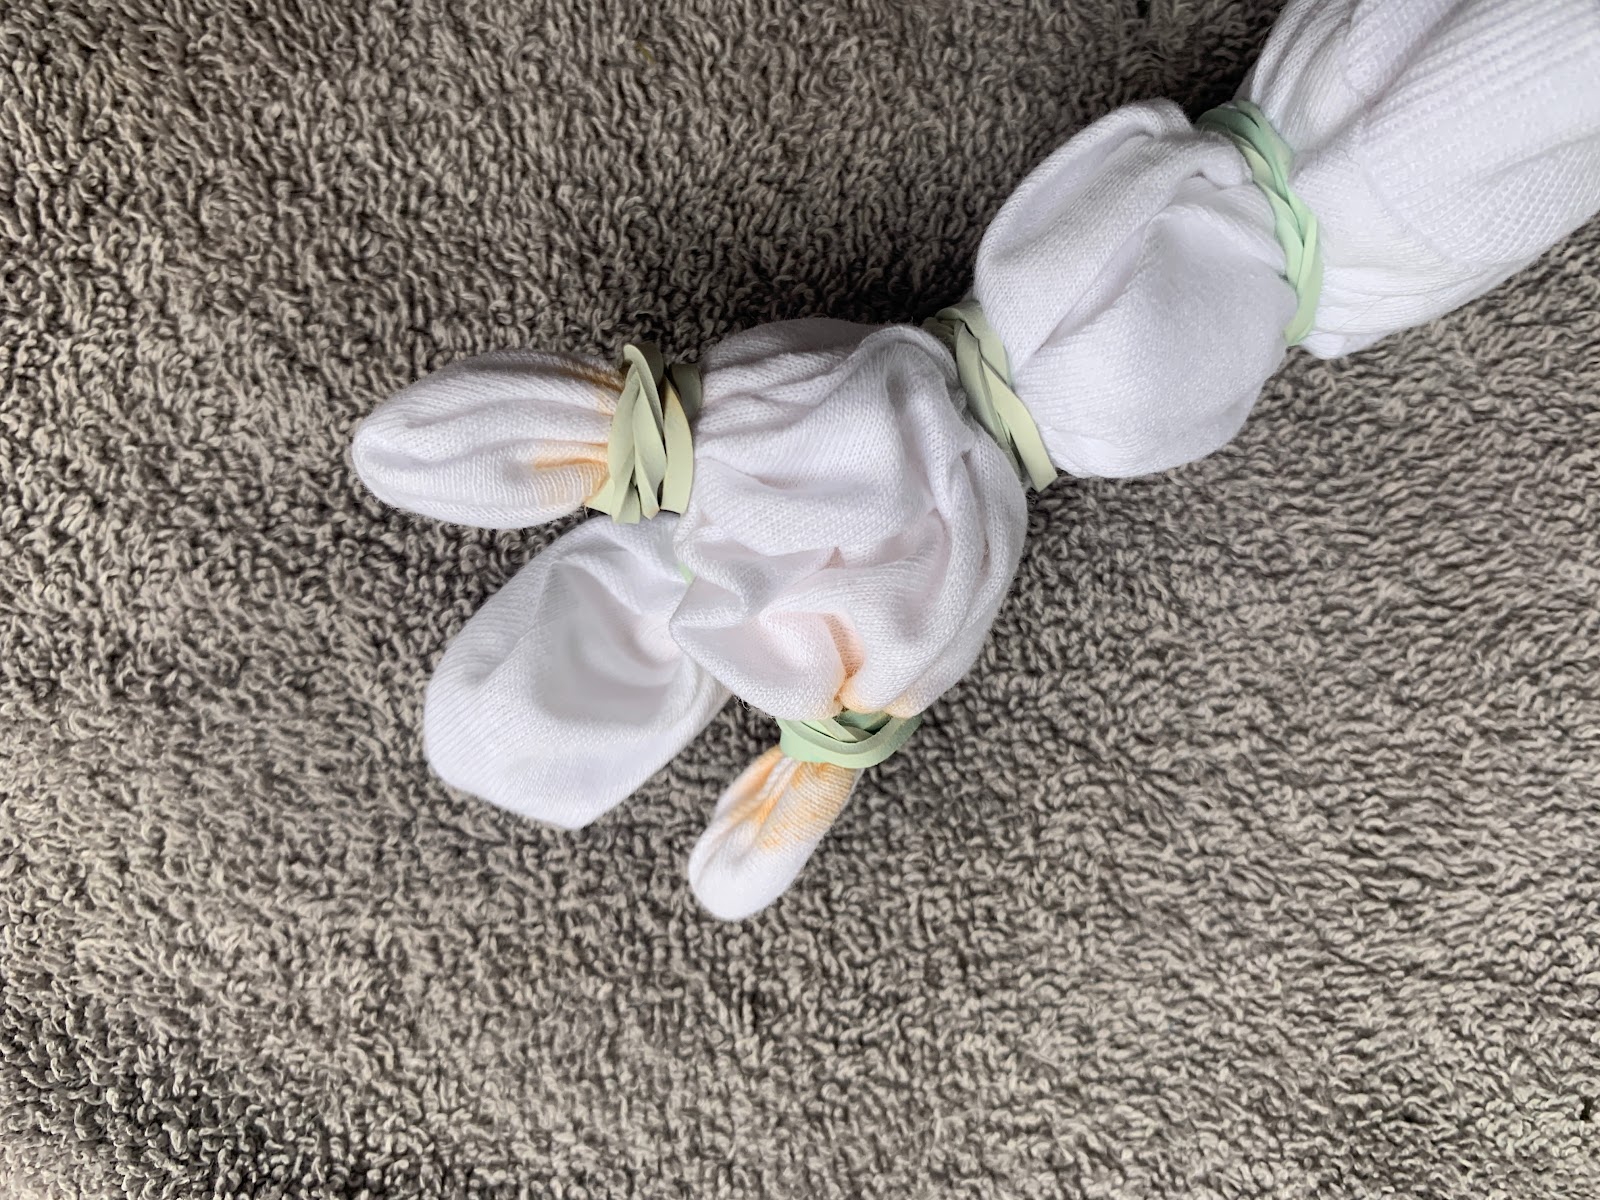
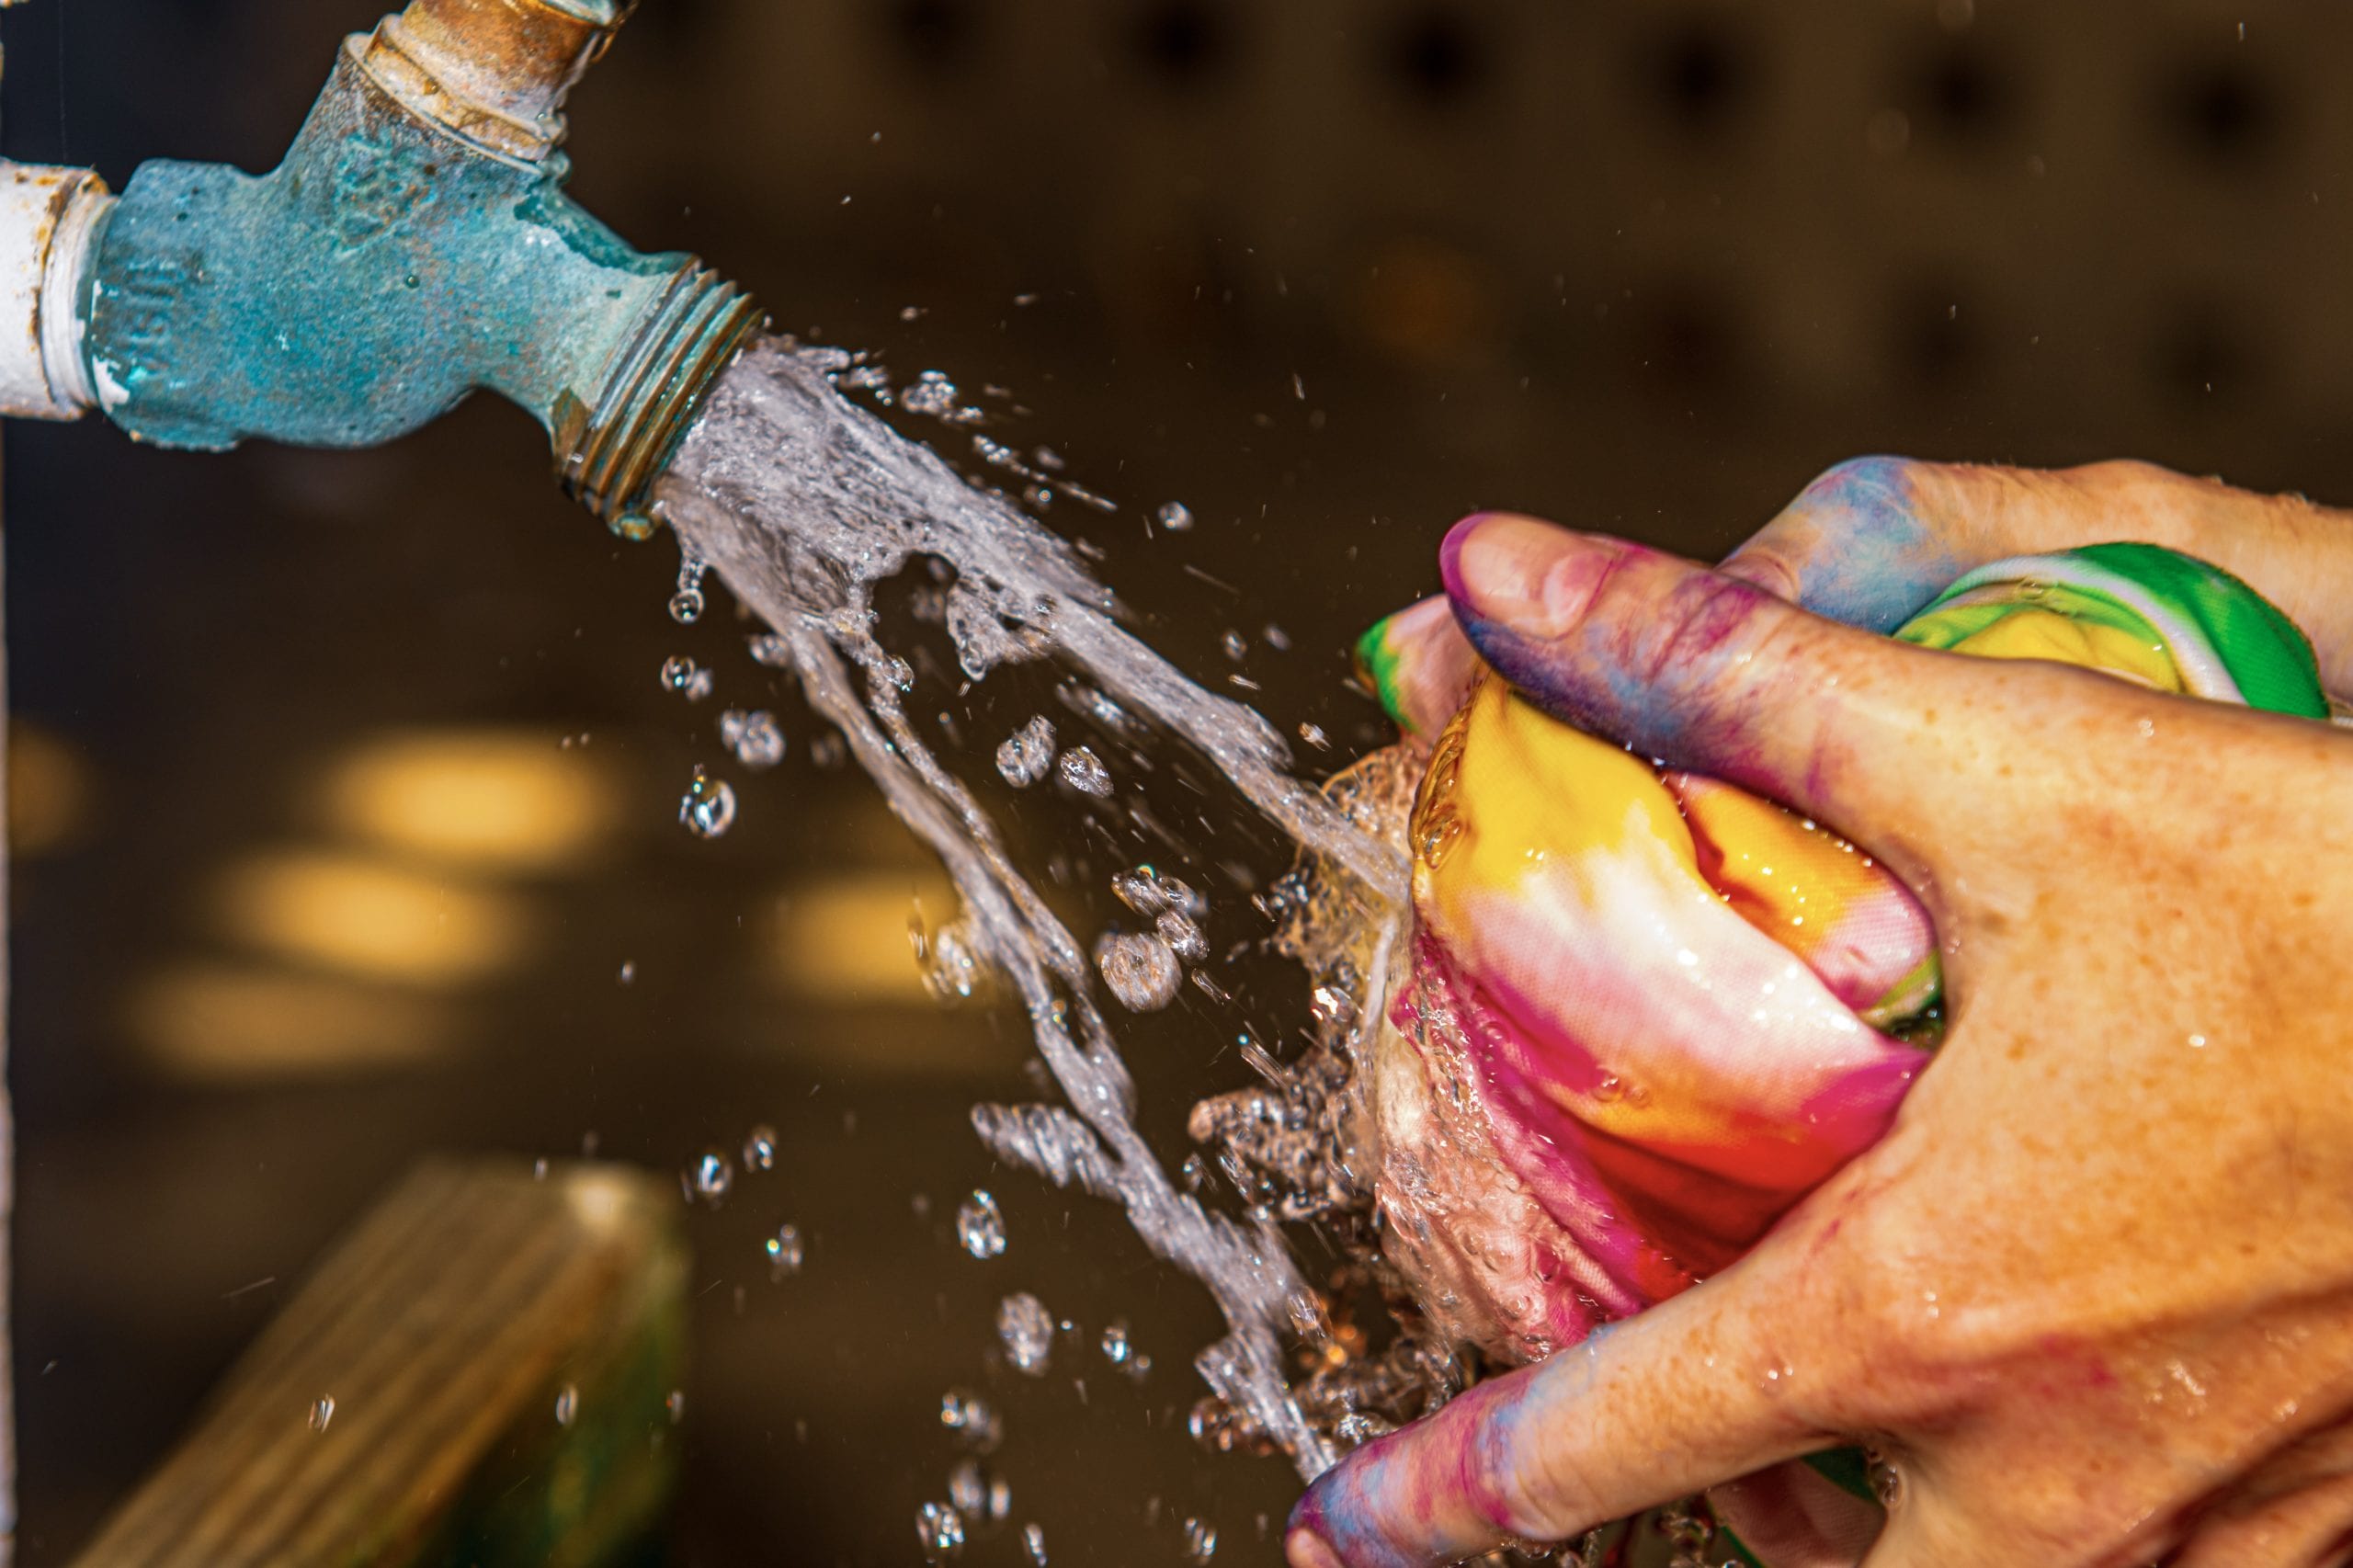
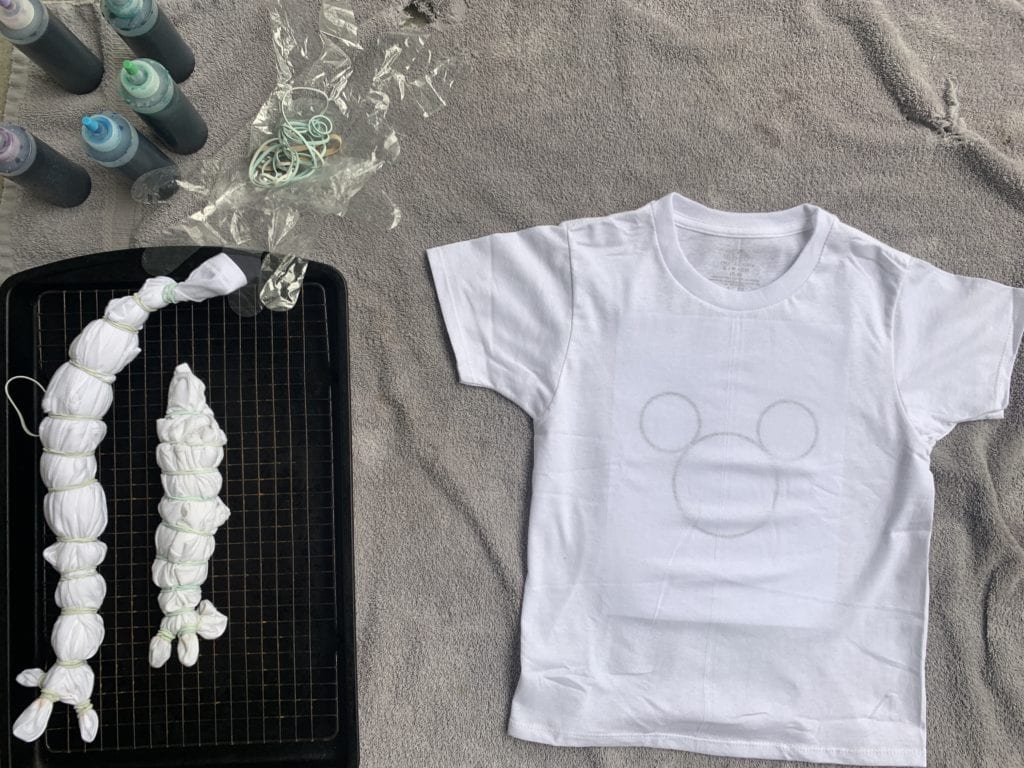
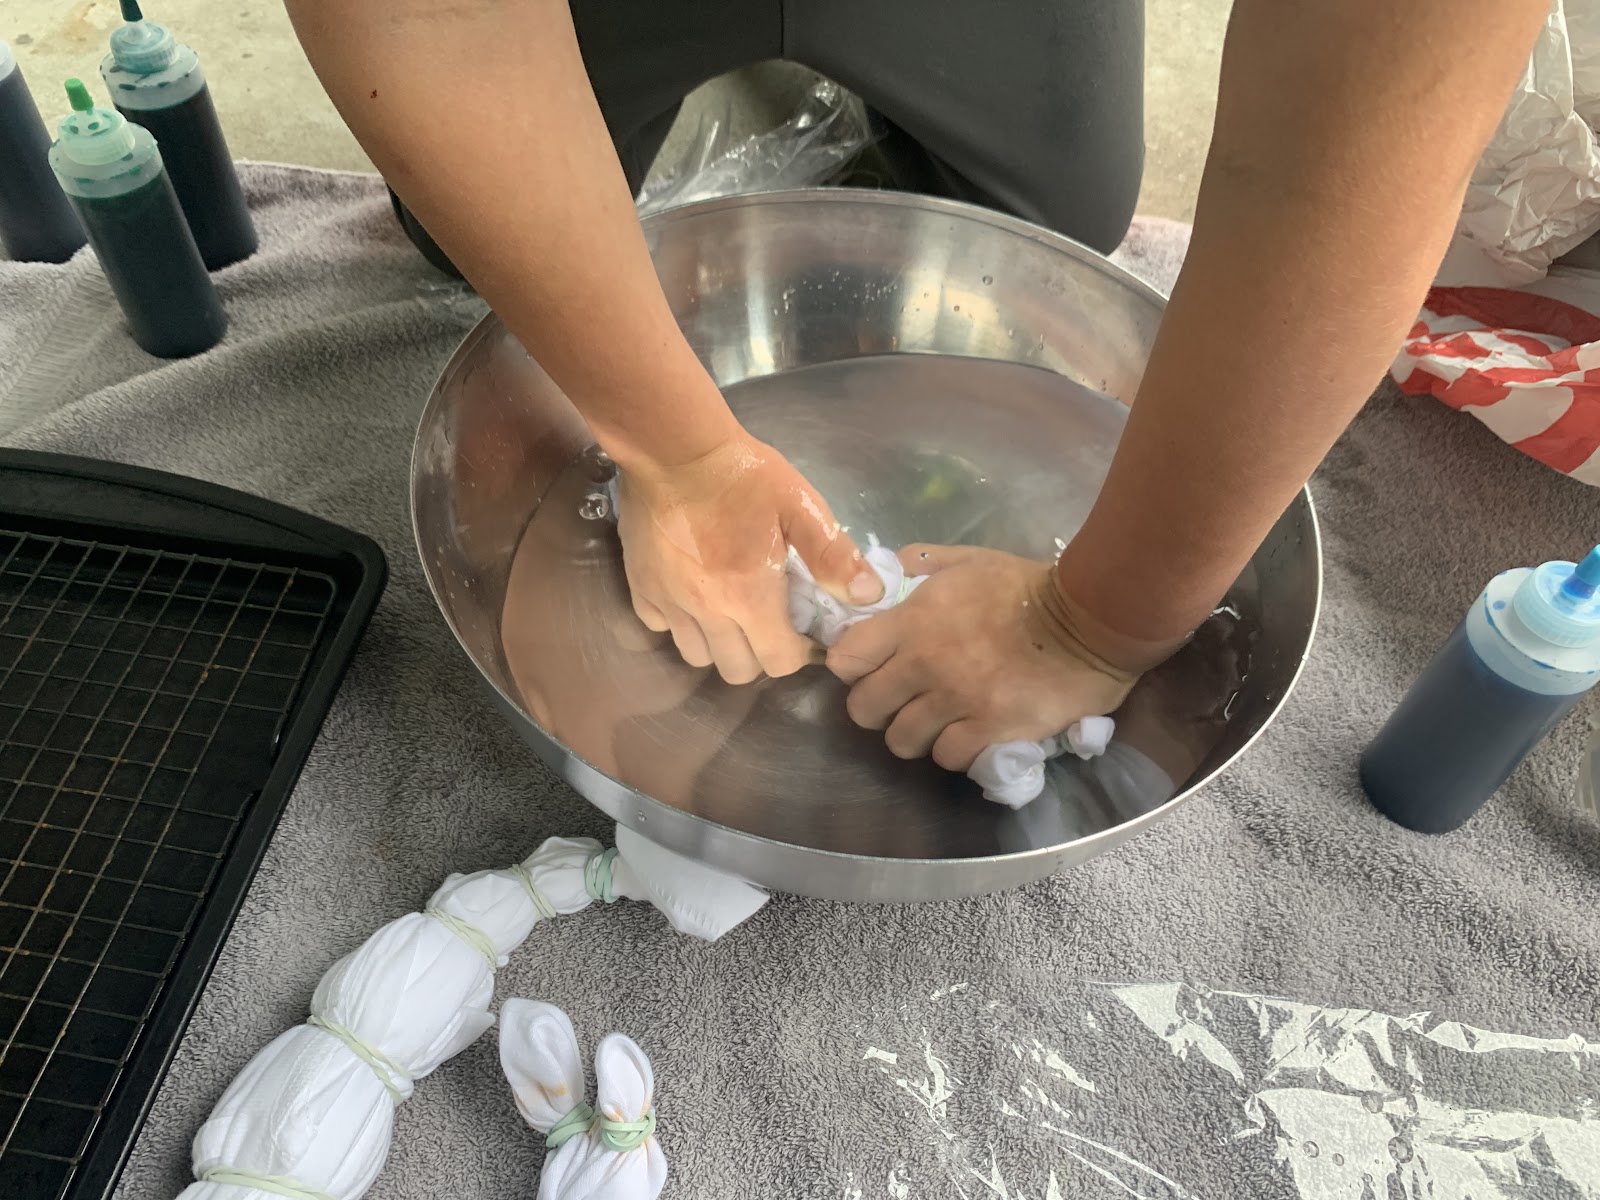
Gather your shirt so that Mickey’s head and ears are at the top, then place the elastics two inch intervals until you reach the end of the shirt. Once your shirt is completely tied, dip the shirt in a large bowl of water until it is soaked. I learned from a friend who is pretty in Tie Dye that it is an important step that many people are missing, but that makes a big difference in the way the shirt ends up looking like. Erase the shirt and put it on a tablecloth or your grid on a saucepan.
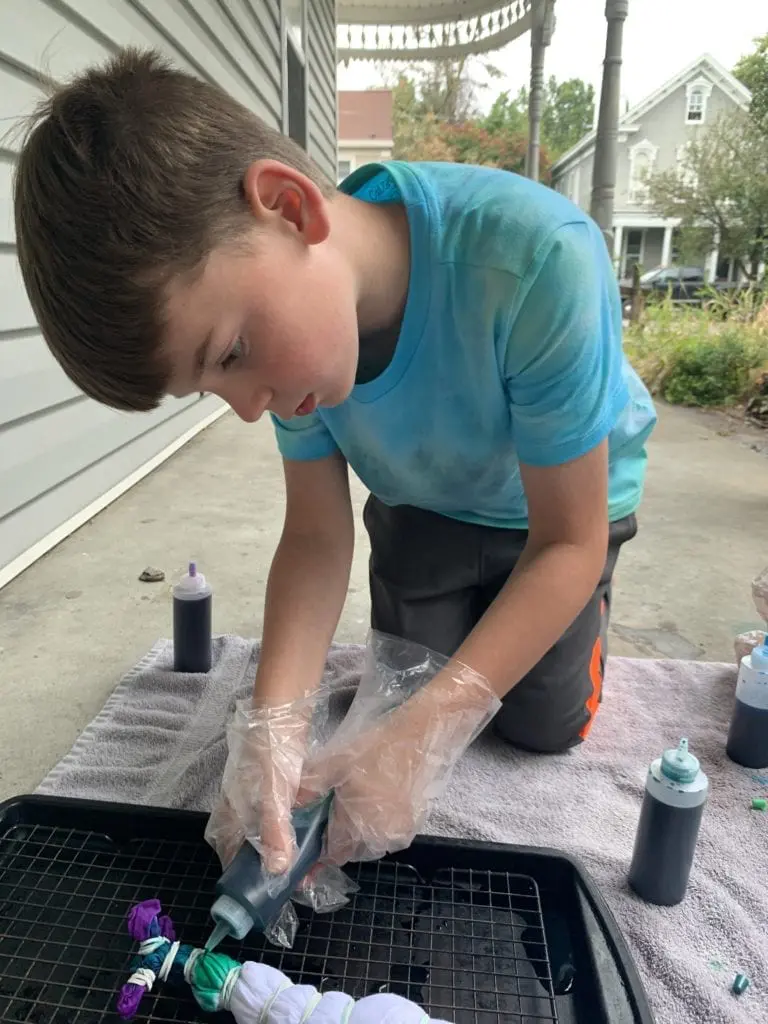
Step 3: Choose your colors
Now for the funny part! First, choose a darker color to dye the ears and Mickey Mouse’s head. This is the only part of the dye process you may want to do for your children. Keep them involved by letting them choose the colors they want. Choose a much lighter or contrasting color to dye the rest of the area. We even left a little white space around the ears and the head so that the colors do not bleed together.
Best trip of all time: Our favorite family vacation ideas for all ages
Again, this will help define the form. Continue to dye the shirt in your favorite color pattern, making sure you use enough coloring to dip the layers of the middle of the shirt.

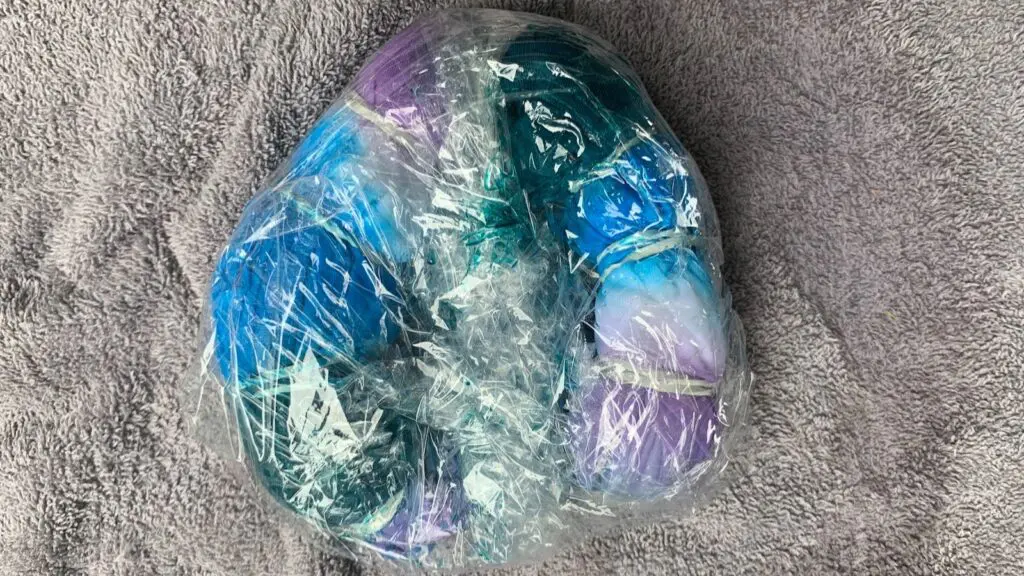
When you are satisfied with the pattern, wrap the plastic film shirt, then place it in a Ziploc bag to let this magnificent color enter all. We have managed, however.
Step 4: Rinse and wash
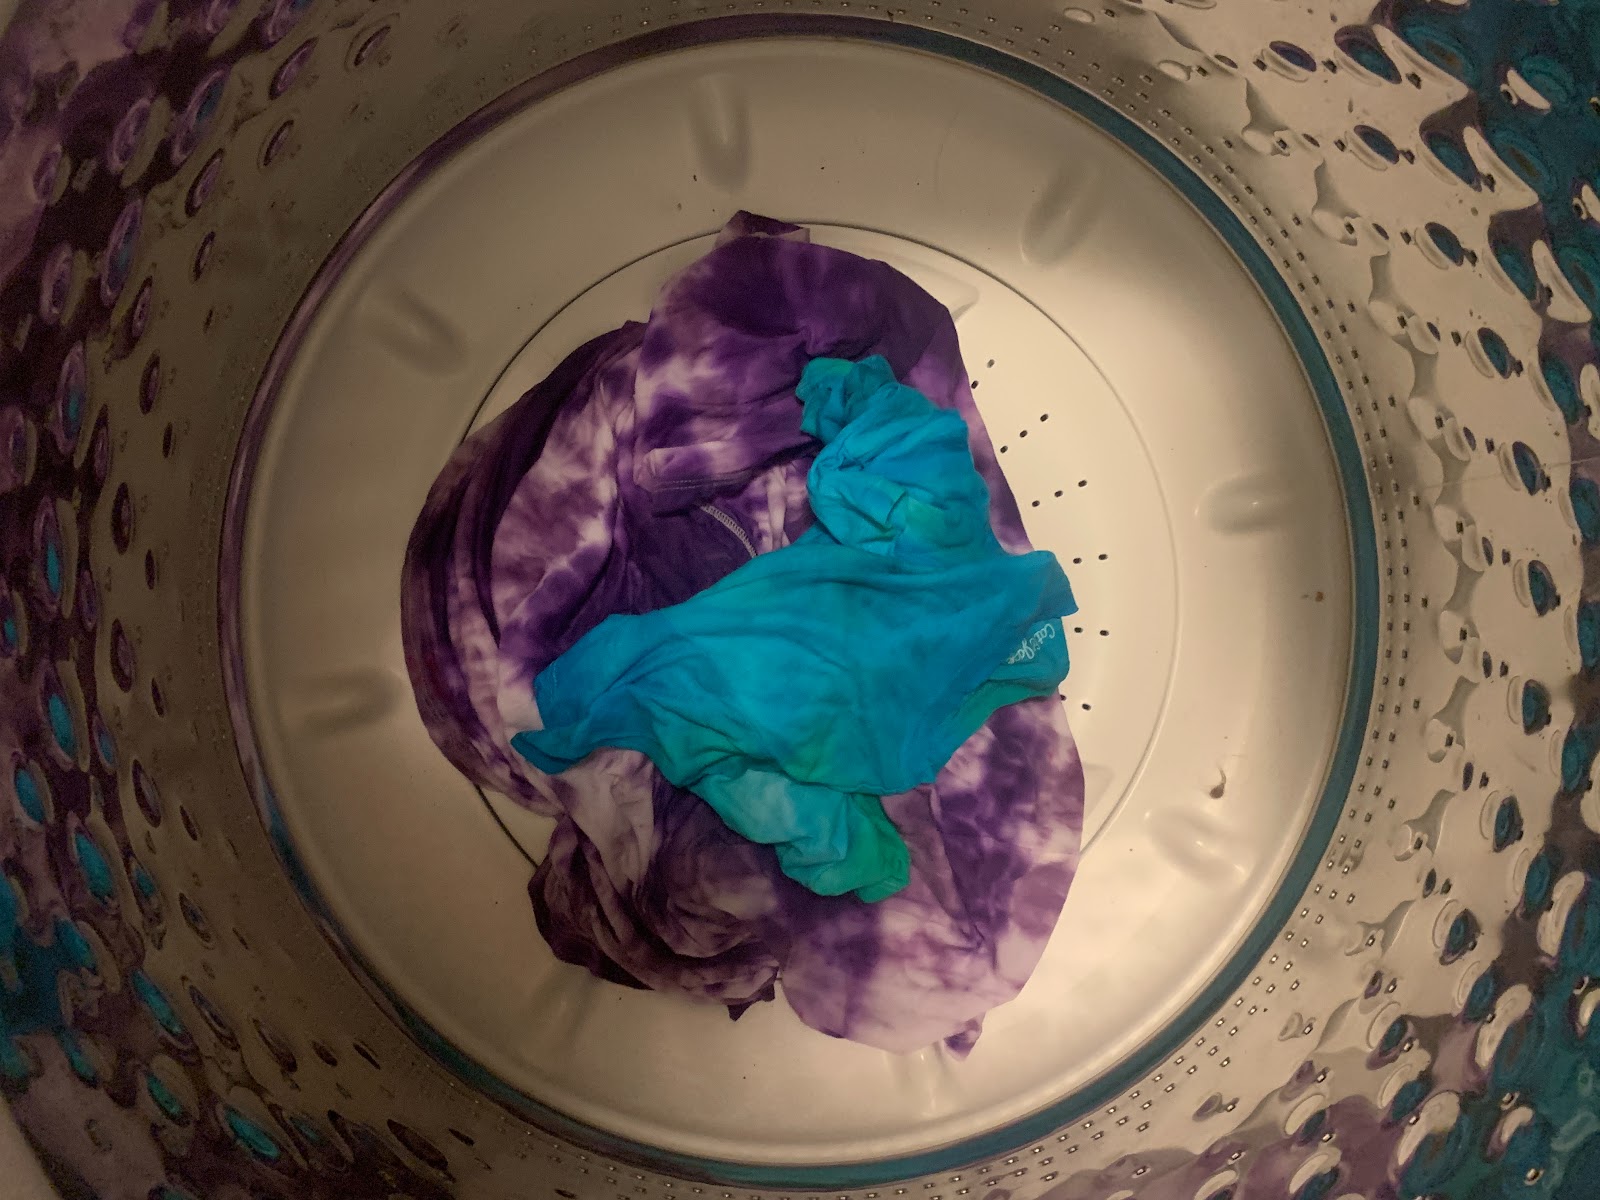
When the 24 hours are sold, put a new pair of gloves, remove the elastics and rinse the shirts in the sink until the water begins to operate in a way. Then throw the shirts in the washing machine (make sure that nothing else is in the machine other than your Tie-Teint shirts) and give them a ride in the dryer before showing your creations.
Packaging advice: What to do for Disney World: the ultimate packaging list
The verdict on our assorted Mickey Tie-Dye shirts

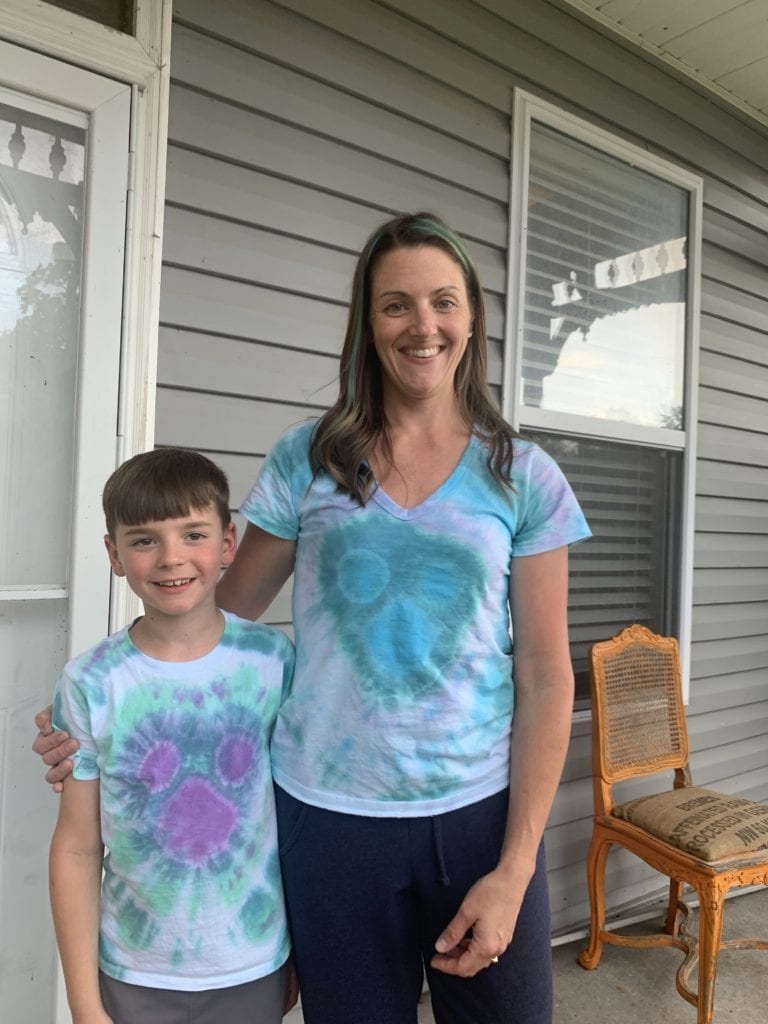
As we said, our first cycle of Mickey Tie Dye shirts corresponded well, but the mickey was not as defined as we had hoped. However, we learned a few things from our attempt, and have adjusted our strategy the second time.
We want the instructions in Disney’s blog and video to have been a little clearer, but we were really satisfied with the final results of our second try and I can’t wait to wear these Dye shirts in Tie-Dye during our next trip.
More Familyvacationist:
Traveling
Game Center
Game News
Review Film
Berita Terkini
Berita Terkini
Berita Terkini
review anime